
Video is one of the most engaging types of content, making it a critical part of every marketing strategy. So, you’ll probably find yourself needing to make videos for your company’s social media and website. But unless you can afford to hire an entire crew, you may have to handle video production on your own. And that starts by learning how to film yourself—by yourself.
Even if you have experience making videos, the idea of presenting, recording, and editing your film can be intimidating.
Just watch the credits on your favorite TV show to see how many people are involved. To film yourself, you’ll have to juggle many of those tasks alone. Plus, you’ll have to meet tight deadlines to keep up with the demands of everyday marketing.
It’s a lot. We get it.
The good news is there’s no shortage of digital equipment and software available today. With the right tools, you can perform many tasks easily. And what would otherwise require an army to achieve can be handled on your own.
To help you learn about filming by yourself, we’ve gathered practical tips that will allow you to produce quality videos for your business.
Knowing How to Film Yourself Means Choosing the Right Equipment
Whether you’re making videos for social media, marketing emails, or your website, the right equipment is key to achieving professional results. You’ll have to select tools to operate and monitor the recording process from in front of the camera. So, to learn how to film yourself, it makes sense to start with a rundown of the equipment you’ll need.
- Select the Right Camera
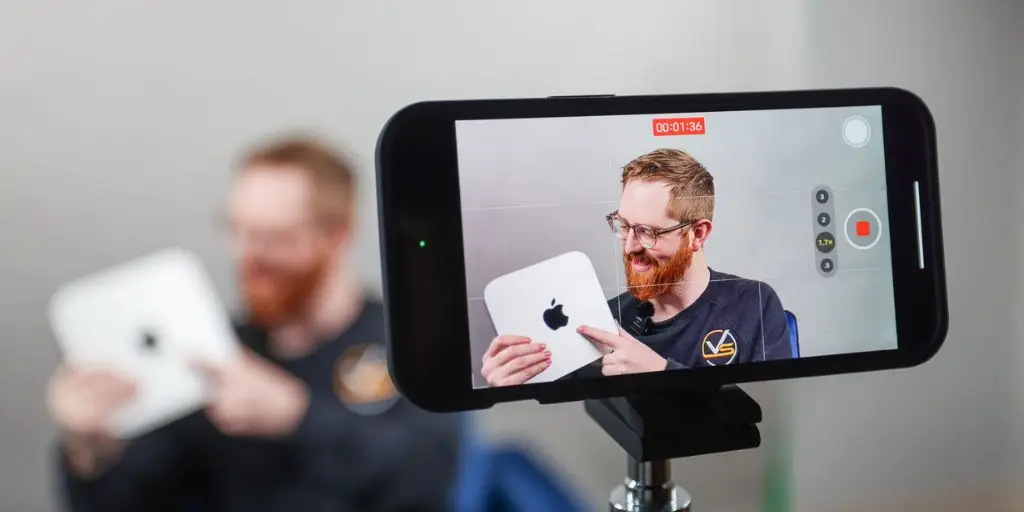
As you probably guessed, selecting the right camera is crucial. Most people use a smartphone or a digital single-lens reflex (DSLR) camera for recording video. And that’s because both can deliver great results.
Here’s what to know…
Smartphones: The smartphone in your pocket will likely produce the excellent, high-resolution images you need. Today’s smartphones have built-in algorithms that automatically adjust focus and lighting sensitivity to achieve results like a pro without training. In most cases, the built-in camera app is all you need!
If you are in the market for a new phone for video creation, aim for one with a 4K resolution for video. You can also work with a 1080p resolution camera, but this will restrict your ability to manipulate your images without compromising quality.
Don’t forget to check whether the front and rear cameras offer different resolutions. If so, use the rear-facing camera.
DSLR/Mirrorless: DSLR or mirrorless cameras are more versatile and offer much more control. These also usually have more sophisticated algorithms to compensate for poor conditions where a smartphone would struggle to deliver quality images.
The downside is that DSLR and mirrorless cameras may require some expertise and experience to use the most valuable features that set them apart from smartphones. You’ll need to know how to adjust the…
- Shutter speed
- Aperture
- ISO
…manually to get the best image. These camera settings can take time to learn to use properly.
Take some time to understand your camera beforehand. You don’t want to learn how to operate a DSLR or mirrorless camera while filming. It will be a huge distraction, especially when you have other things to worry about!
Another advantage of DSLRs is that you can swap different lenses according to distance and change the perspective of your images. There’s a huge range of lenses to choose from, but a fixed wide-angle camera lens (under 30 mm) is an excellent place to start. Zoom lenses will provide more versatility, though.
- Choose Your Lighting
To film yourself for a video, you can either use existing lighting or invest in studio lights. You can achieve great quality results with either. However, opting for natural light means you have to work with what is available at the time.
You can also use the built-in units on your camera or smartphone in a pinch. Or, you can tack on an additional ring light. But to get satisfying results using artificial lighting, you will need at least a couple of bulbs located away from your camera.
A three-point lighting setup is ideally what you are aiming for. (We’ll explain that later.)
- Pick a Microphone

Engagement will suffer if your audience struggles to hear what you’re saying. So, it’s well worth investing in a high-quality microphone. The main mic options for recording sound include the following:
- Studio mics on a stand
You can try out the Shure SM7B Vocal Microphone for that podcaster look.
- Lavalier or lapel mics you can pin to your clothing, giving you more mobility
For these types of mics, we recommend the RØDE Wireless Go II.
- Shotgun microphones, which are flexible options and can fix to your camera
If you’re just starting out, we recommend the RØDE VideoMic NTG.
- Get a Rock-Solid Tripod
A steady camera is a key part of how to film yourself well. And for that, you need a sturdy tripod. It keeps your camera still and ensures you can record from the ideal location to record your video.
Although your tripod doesn’t need to be expensive, it should be large enough and have enough adjustment to position the camera wherever you need it.
The most popular tripod brand in the country is Manfrotto, like the 290 Xtra model. However, you can find inexpensive tripods elsewhere, like this one.
- Use Software That Makes Editing a Breeze
An essential part of producing great videos is the editing process. If you’re doing the whole operation on your own, you’ll want video editing software that is quick and easy to use but sophisticated enough to provide you with professional results. Look out for software that will allow you to easily…
- Cut, splice, and rearrange clips
- Edit your video with drag-and-drop features
- Switch back and forward between editing and review modes
- Overdub voice and other sounds
- Overlay and customize titles, credits, and captions
Adobe Premiere Pro has a steep learning curve, but it’s worth the effort. This video editor offers a variety of tools to craft high-quality videos. It even has AI features to take care of tedious tasks and speed up editing.
If you’re not ready to invest in such a robust tool, there are free options available as well. For instance, Mac and iPhone users can give iMovie a try. (You can find a helpful iMovie tutorial for beginners here.) Windows and Android users can give Adobe Premiere Rush a go. Another popular choice is CapCut, a free tool from the creators of TikTok that has become the preferred way to edit videos specifically for social media. Additionally, YouTube recently announced its competitor to TikTok—YouTube Create.
Knowing How to Film Yourself Means Careful Preparation
A big part of learning how to film yourself is understanding the preparation required. Even the most natural, laid-back videos are carefully thought out ahead of time. By doing some pre-production tasks in advance, you’ll be prepared when the time comes to film.
- Choose and Prepare a Location to Film

Think About Your Background
It’s important to have a quiet, well-lit place to film yourself. This could be outside, a corner of your home or office, or a room you can call your permanent studio. The point is to pick a location that will put you in the best position possible.
Think about your background. Remove any clutter that will distract your audience. You want them to focus on you, not what’s behind you. So, select a background that appeals to your audience and is appropriate for your line of work.
A clean background with a few carefully placed ornaments or plants can give you a modern, professional look.
Eliminate Background Noise
You need to be aware of your environment, whether recording inside or outside. Background noise can irritate your audience and make your recording inaudible. That’s why you need to choose your location carefully.
The room's acoustics can also be critical to ensure satisfactory sound quality. If you have a room with hardwood floors and minimal furniture, you may get problems with resonance. That’s where the sound bounces off the walls and makes it sound like you are in an echo chamber.
You can try attaching sound-deadening foam or boards to the walls, hanging heavy curtains, and dropping down a rug to reduce this effect.
- Prepare Your Script
No matter what type of video you’re filming, it’s a good idea to have a script. You can create a complete script or just jot down talking points. The key is to practice your lines first. You need to be familiar with what you want to say to sound natural and avoid waffling.
You can also use a teleprompter to help you during filming, but you don’t want to rely on it too much. Your eyes should be focused on the camera so you’re speaking to your audience. So, have a firm grasp of your content and use the teleprompter to stay on pace.
Don’t forget to add a CTA (call to action) at the end of the video. Failing to do so is a common mistake and a missed opportunity.
- Select Your Wardrobe
Chances are you won’t have access to a wardrobe specialist if you are just learning how to film yourself. But that doesn’t mean you shouldn’t give any thought to your clothing. Being thoughtful about what you wear can help you project the right image.
Choose colors and designs that reflect your brand. Ask yourself if you want to establish authority with more formal clothing or be more relaxed wearing something your audience will relate to. Generally, neutral solid colors work well. And avoid bright colors like red or bright white.
Keep in mind the heat from your lights can cause you to glow with sweat. So, consider using a little makeup to prevent having a pallid or shiny complexion.
- Coach Yourself on Filming Best Practices
As you’re preparing to film yourself, it’s a good idea to get familiar with best practices. A little coaching can go a long way in helping you get comfortable and present the best version of yourself. Although most of these will seem like common sense, it’s easy to forget when you’re in front of the camera. So, try to keep the following tips top of mind:
- Use hand movements, but avoid excessive gesturing.
- Be aware of your posture and sit/stand up straight.
- Keep your facial expressions friendly and relaxed.
- Incorporate pauses for more natural speech.
- Let your shoulders rest.
- Don’t cross your arms.
“The best way to couch yourself is to watch other creators in your industry with a close eye. Think about what they do and how they speak, then make it your own! It’s always best to be yourself and remain authentic to your audience.”
Knowing How to Film Yourself Means Shooting Like a Pro
Now it’s time for the main event—shooting your video. It may seem straightforward, but there’s a lot that goes into production. And if you want to learn how to film yourself the best way possible, you need to make sure you’re set up for success.
- Get the Best Composition and Camera Angle
Before you begin filming yourself, it’s important to factor in the camera angle. This is where your tripod comes in…
The standard position is to have the camera directly opposite your face or a fraction above your eye level. Too low, and you can catch too much under the chin, which can be unflattering. In addition, too high an angle can accentuate a thinning hairline and make you appear smaller than you are.
When considering composition, keep your eyes about a third from the top of the frame, leaving a little space above your head.
As a general rule, use landscape for longer-form videos on YouTube, for example. Portrait mode is suited to shorter social media formats such as X, TikTok, Instagram, and Facebook Reels.
If you always record from the same angle, your presentation may feel static. You can breathe new life into your videos by varying your camera angle from time to time.
You may also want more than one perspective if you…
- Want to add dramatic effect
- Have a guest speaker
- Want to get creative to make it more exciting or fun
So, don’t be afraid to play around with angles and the way you position yourself in front of the camera.
- Achieve the Right Lighting
If you want to know how to film yourself like a pro, getting the light right is one of the most important skills you’ll need to learn.
Being overexposed, especially from direct light, will risk you appearing gaunt and pallid. On the other hand, underexposed footage will appear dark, making it hard to make out your features. Shadows can dramatically change your appearance. Depending on where a single light source is located, it can create unattractive shadows or make you appear flat and featureless.
You’ll have more control over the manual settings on a DSLR or mirrorless camera. Here are some recommended settings for ideal lighting. If conditions are anything other than ideal, you’ll have to adjust the settings accordingly:
- Use a frame rate of around 30 frames per second for smooth recording.
- Use a shutter speed of roughly 1/60th of a second (double your frame rate) to avoid flicker and other problems.
- Set your ISO as low as possible to avoid graininess.
When You’re Using Natural Light
If you are using natural light outdoors, the best time to shoot is roughly an hour before sunrise and just after sunset. At this time of day, the lighting will have a softer appearance. Plus, the colors will be well-saturated.
Direct light from the sun can cause glare or shadows and wash out your appearance, especially if facing the sun. You’re better off recording in the diffused light from an overcast sky or staying in the shade.
You can also get better lighting by filming indoors and using the indirect light from windows. Don’t have the window behind you and the camera facing you since this will create a silhouette. Indirect light from a window to your side is usually much more flattering.
When You’re Using Artificial Lighting
Although phones and cameras can adjust for lighting conditions up to a point, you often need supplementary lighting.
Lighting a subject from three sources is a widely used standard for filming, but you can also get away with two.
The key to great lighting is positioning your light sources to create a soft image that compliments you while avoiding double shadows. You can also use diffusers over the bulbs to help to make the light less directional.
Your primary light, or key light, should be the brightest and be directed toward the side of your face at a roughly 45-degree angle. A secondary, or fill light, can help eliminate shadows to create a softer, less contrasted image. You can start by placing the secondary light at a 45-degree angle on the other side of the primary light source from your camera and then move it around until it provides the best light for your subject.

You can also use a third light source (aka back light) behind you at a slight angle to provide backlighting. This helps you stand out in the foreground. Backlighting should not challenge the front lights, or you will get silhouetting.
“It’s important to remember how bright your lights need to be. A key light is your main source of light, so keep that the brightest. Your fill light does what it says—fills what your key light is missing! Key your fill to around half as bright as your key.”
- Record High-Quality Sound
Great sound is essential to filming yourself, so you need to take steps to eliminate any background noise. When you are used to the sounds in the background, you tend to tune them out automatically. But your microphone will pick them up!
So, before recording, make sure that there are no distracting noises. Place your microphone close to your mouth if you are using a lavalier (lapel) mic or a standing microphone. Confirm that your lapel mic isn’t picking up noise from your clothes or your breath.
Directional shotgun microphones are another way to go and can be placed on top of your camera.
Additionally, make sure to check and adjust the recording level so that your voice is clear while avoiding distortion by keeping the sound meter out of the red zone.
- Use a Monitor
If you had a production team, you could have someone monitoring you as the recording is in progress and give you instructions from behind the camera. But if you are filming by yourself, you don’t have that luxury. Fortunately, there are ways to get around that.
Using your laptop as a monitor is the next best thing. You can glance at it to catch any issues and adjust your presentation as you go along. The monitor can also be used as a teleprompter.
When recording, you should keep your eyes on the camera while you talk. So, place your laptop facing you as near to the camera as possible.
- Leverage Remote Control
Another useful tool for recording yourself and achieving professional-looking videos is a remote control. It can enhance your filming experience and make the recording process more convenient.
Although most DSLR and mirrorless cameras don’t come equipped with remote controls, they can be purchased separately. This makes it extremely easy to capture yourself on camera without having to rush back and forth. These remotes allow you to start and stop recording, adjust settings, and even change your camera’s angle without needing an extra hand.
If you don’t have or want to buy a dedicated remote, you can use your phone to control your camera while filming yourself. Many of the most popular brands have their own apps. For example…
- Canon has the Canon Camera Connect app
- Nikon has its SnapBridge app
- Sony has its Imaging Edge Mobile app
To select the right app, you just need to consult your camera’s manual for specifics. But the benefit of using your phone is that it acts as a monitor for reviewing your shot as you film.
- Do a Trial Run
If you thought you’d only be filming yourself once, think again. You want to feel and appear relaxed as you film, which is why a trial run is strongly recommended. This will help ease you into speaking in front of the camera.
You can either do a brief recording test or run through the entire video. The goal is to get yourself comfortable filming and to determine if you need to make any adjustments.
Review your test video to check for problems such as failing to look at the camera, project your voice, or speak clearly.
Also, look for issues related to the following:
- Lighting
- Sound
- Focus
- Composition
Correct the problems you come across and give it another try. Once you’re happy with the results, you can start recording for real.

Knowing How to Film Yourself Means Polishing Your Video
Once the shooting is all done, you can move on to post-production work. This is the last step before you distribute your video. Basically, it’s all about taking your footage and creating a tight story that engages your audience.
- Watch the Video
First things first, you need to watch the video to see what you have created. You may even want to watch it several times to ensure you haven’t missed anything. Keep in mind your raw footage will be just that—raw. Any minor flaws can be addressed in the next phase.
Reviewing the video will allow you to see how your footage can be edited to tell your story better. Plus, it will help you determine if you have to film yourself again and do additional takes. You can also check for bloopers, sound problems, or other mistakes you need to correct.
A best practice is to take note of any mistakes made in your recording with relevant time stamps of where they occurred. This will make the editing process go a lot smoother.
- Edit the Video
The primary purpose of editing is to create the best finished video possible. Using your video editor, you can edit for length and flow. You can change things around and place your clips in a logical sequence. Remember that your video should tell a story with a natural beginning, middle, and end.
This is also the time to do any necessary overdubbing. For example, you may want to add a narrator’s voice. Or, if there is a place where the sound is inaudible, or you fluffed a line, you can record over it. Just make sure the voice lines up and check for continuity errors.
When you’re satisfied with how it appears, and the story is lined up, add the title, credits, and any explanatory captions you need. And don’t forget to add your credits as the narrator, presenter, cameraperson, sound engineer, director, producer, costume designer, scriptwriter… You deserve the credit!
- Enhance the Video
Last but not least, you can add special effects to enhance your video. If you’re just learning how to film yourself, you may want to keep things simple. As you become comfortable with the entire video-making process, you can explore different ways to make your videos more engaging.
Here are some examples:
- Adding royalty-free music (plans are available from platforms like Artlist)
- Incorporating transitions from one scene or section to another
- Changing video speed, especially with B-roll
- Including graphics and animation
- Putting in 3D text overlays
Although you don’t want to go overboard, special effects can do a lot to capture and retain your viewers’ attention. So, it’s worth playing around with them to see what your audience responds to.
Takeaway
Videos are playing an increasingly important role online, which means your business needs to keep up. But depending on your marketing budget, you may be required to present, film, and produce videos on your own. Learning how to film yourself can be daunting. Fortunately, the technology available makes it possible to create professional productions entirely on your own.
If you’ve been tasked with creating and producing high-quality vlogs or videos to share with your audience, don’t be intimidated. Just save this blog as a resource, take the time to learn the basics, and get started. And remember that practice makes perfect!
If you need any help with your video marketing strategy, request a free consultation with Viral Solutions today. Our team would be happy to talk to you about your needs!
